Form 16 Text Editor
Program Navigation: Simplicity > toolbar Frame > Master Data > Form 16 Editor
|
Navigation: The User Interface > What is in Simplicity > Main Menu > Master Data > Form 16 Text EditorProgram Navigation: Simplicity > toolbar Frame > Master Data > Form 16 Editor |
·This editor allows the user to edit specific sections of the form 16 template used when printing the form 16 + Starter Pack report found in the Client Debt Counsel Reports.
·Many Company specific details can be referenced here, such as the Attorney used as the Attorney-of-Record and Agent, the DC information, Client information and budget and mandate information.
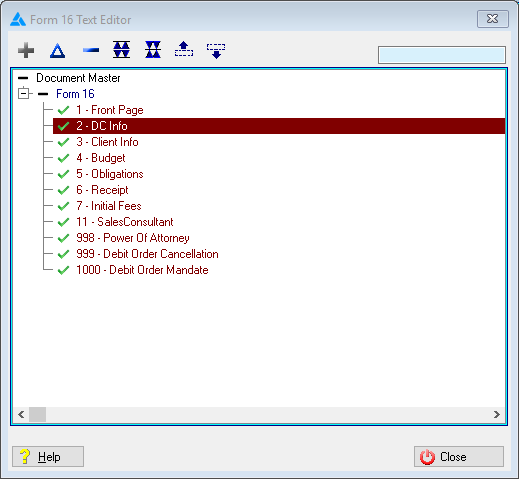
This is an example of the Form 16 editor browse
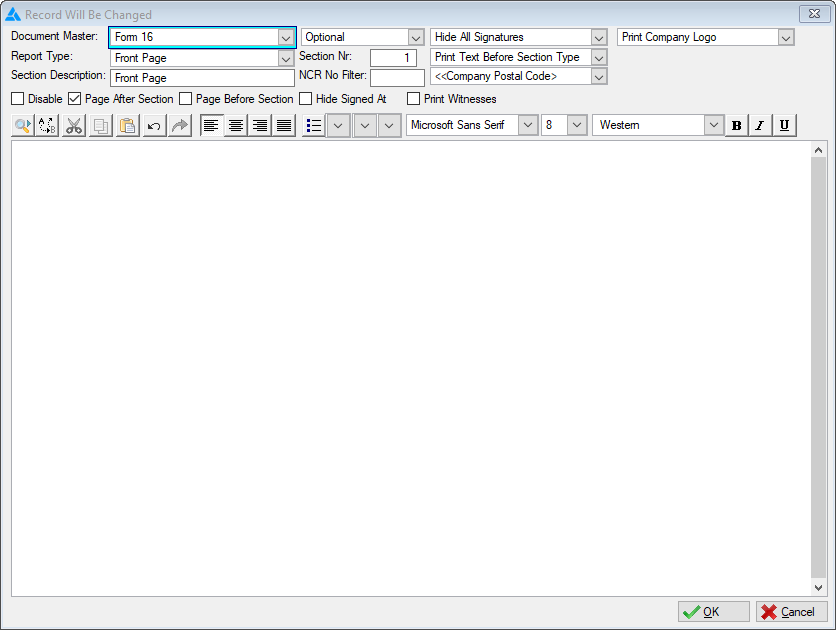
This is an example of the Form 16 editor form
 Click here to view a list of all the features that can be used in this window
|
·Report type: oAllows the user to select the report type for the selected section. §This report type will insert a front page for the form 16 when printed and makes use of the Form 16 Front Page logo in the company parameters. §DC Info: §This report type will insert the Debt Counsellors information on the form 16 when printed.for §Client Info: §This report type will insert the Client's information on the form 16 when printed. §Budget: §This report type will insert the Budget of the client on the form 16 when printed. §Obligations: §This report type will insert the Obligations of the client on the form 16 when printed. §Excluded Obligations: §This report type will insert the Excluded Obligations of the client on the form 16 when printed. §Receipt: §This report type will insert the Receipt of application for debt review on the form 16 when printed. §Power Of Attorney: §This report type will insert the Power Of Attorney (to act on behalf of another person) on the form 16 when printed. §Debit Order Cancellation: §This report type will insert the Debit Order Cancellation form (to cancel all debit orders) on the form 16 when printed. §Debit Order Mandate: §This report type will insert the Debit Order Mandate from Hyphen (to mandate for payment instructions) on the form 16 when printed. §Sales Consultant: §This report type will insert the Sales consultant on the form 16 when printed. §Initial Fees: §This report type will insert the Initial fees on the form 16 when printed. §Transfer Request: §This report type will insert the Transfer Request of the client on the form 16 when printed. §Respondent Table: §This report type will insert the Respondent Table on the form 16 when printed.
·Section Description: oAllows the user to insert a name for the current form 16 section.
·Section Status: §Allows the user to select a status for the current form 16 section. §Optional: This status will make the section optional when printing. §Required: This status will make the section required when printing.
·Merge Fields: oThis option will insert the selected merge field into the body of the selected section.
·Signature Options: oAllows the user to select the signature options for the selected section. §Hide all Signatures: §This option will remove the signatures from the current report section. §Show Client Signature Only: §This option will add the client's signature only, to the current Section. §Show Client and DC Signatures: §This option will add the client's signature and DC signatures to the current Section.
·Text Options: oThis option will allow the user to select a print option for the text. §Print Text Before Section Type: §This option will print the text inserted in the text box before the content of the current Section type. §Print Text After Section Type: §This option will print the text inserted in the text box after the content of the current Section type.
·Rich Text Editor: oAllows the user to insert text to the current section.
·Logo: oAllows the user to insert a logo on the selected section. §Hide logo: §This option will remove the logo from the current report section and will hide the logo options. §Print Custom logo: §This option will allow the user to insert a custom logo for the current section. §The user must add a custom logo to the documents browse or select an existing logo. §Logo select box: §This option will allow the user to select the logo file. §Width: §Determines the width of the logo. §Logo X Position: §Determines the position of the logo on the X-axis (Horizontal), (0 = Extreme left). §Logo Y Position: §Determines the position of the logo on the Y-axis (Vertical), (0 = Extreme Right).
·Disable: oThis option will hide the current report section.
· Page After Section: oThis option will force the next report section to start on a new page.
·Page Before Section: oThis option will force the current report section to start on a new page.
·Print Witnesses: oThis option will display blank witness fields at the end of the current report section.
·Hide Signed At: oThis option will hide the "Signed at" section on the report. |
General Features available in this window:
Ø  Insert
Ø  Change
Ø  Delete
Ø Browse
Ø Text box
Ø Sort
Ø OK
Ø Cancel
Ø Close